
2018 Season 2 Map Pool ZvZ Overlord Paths
16-Bit
Acid Plant
Catalyst
Darkness Sanctuary
Dreamcatcher
Lost and Found
Redshift
I am happy to present overlord paths for the 2018 season 2 map pool. This first article features paths for ZvZ for each map, and future articles will have paths for both ZvT and ZvP. The red and yellow lines dictate paths for the first and second overlords, and the green, purple and blue numbers indicate locations for your third, fourth and fifth overlords. Yellow or Red coloured shapes indicate an area to keep your overlord until something in the game occurs (usually once you see them take their third base) and then once that event occurs, you can continue on the path. The white circles are approximations for the areas of vision which you should strive to have with each overlord. Darkness sanctuary is a little complicated, so I will explain those paths when I get there.
16-Bit
Notes
Some notes for 16-bit, the first and second overlords are slightly off center to scout for incoming 12 pool or similar rushes. Additionally, with your second overlord you can keep it on the left of the pocket base so that you can see their drone count, however if you do this you should try to have a Zergling or other spotter unit on the map where the second overlord would end up to see your opponents units leaving. The red and yellow circles indicate to keep the first and second overlords there until you see them take each expansion.
Acid Plant
Notes
Two important things to keep in mind are leave your second overlord on the yellow circle until they have taken their third base. Also, some Zergs will take the other third base, you should be able to see their drone leave with your first overlord in this case to know when they have taken the third, however it is also useful to send a Zergling to the other potential third location.
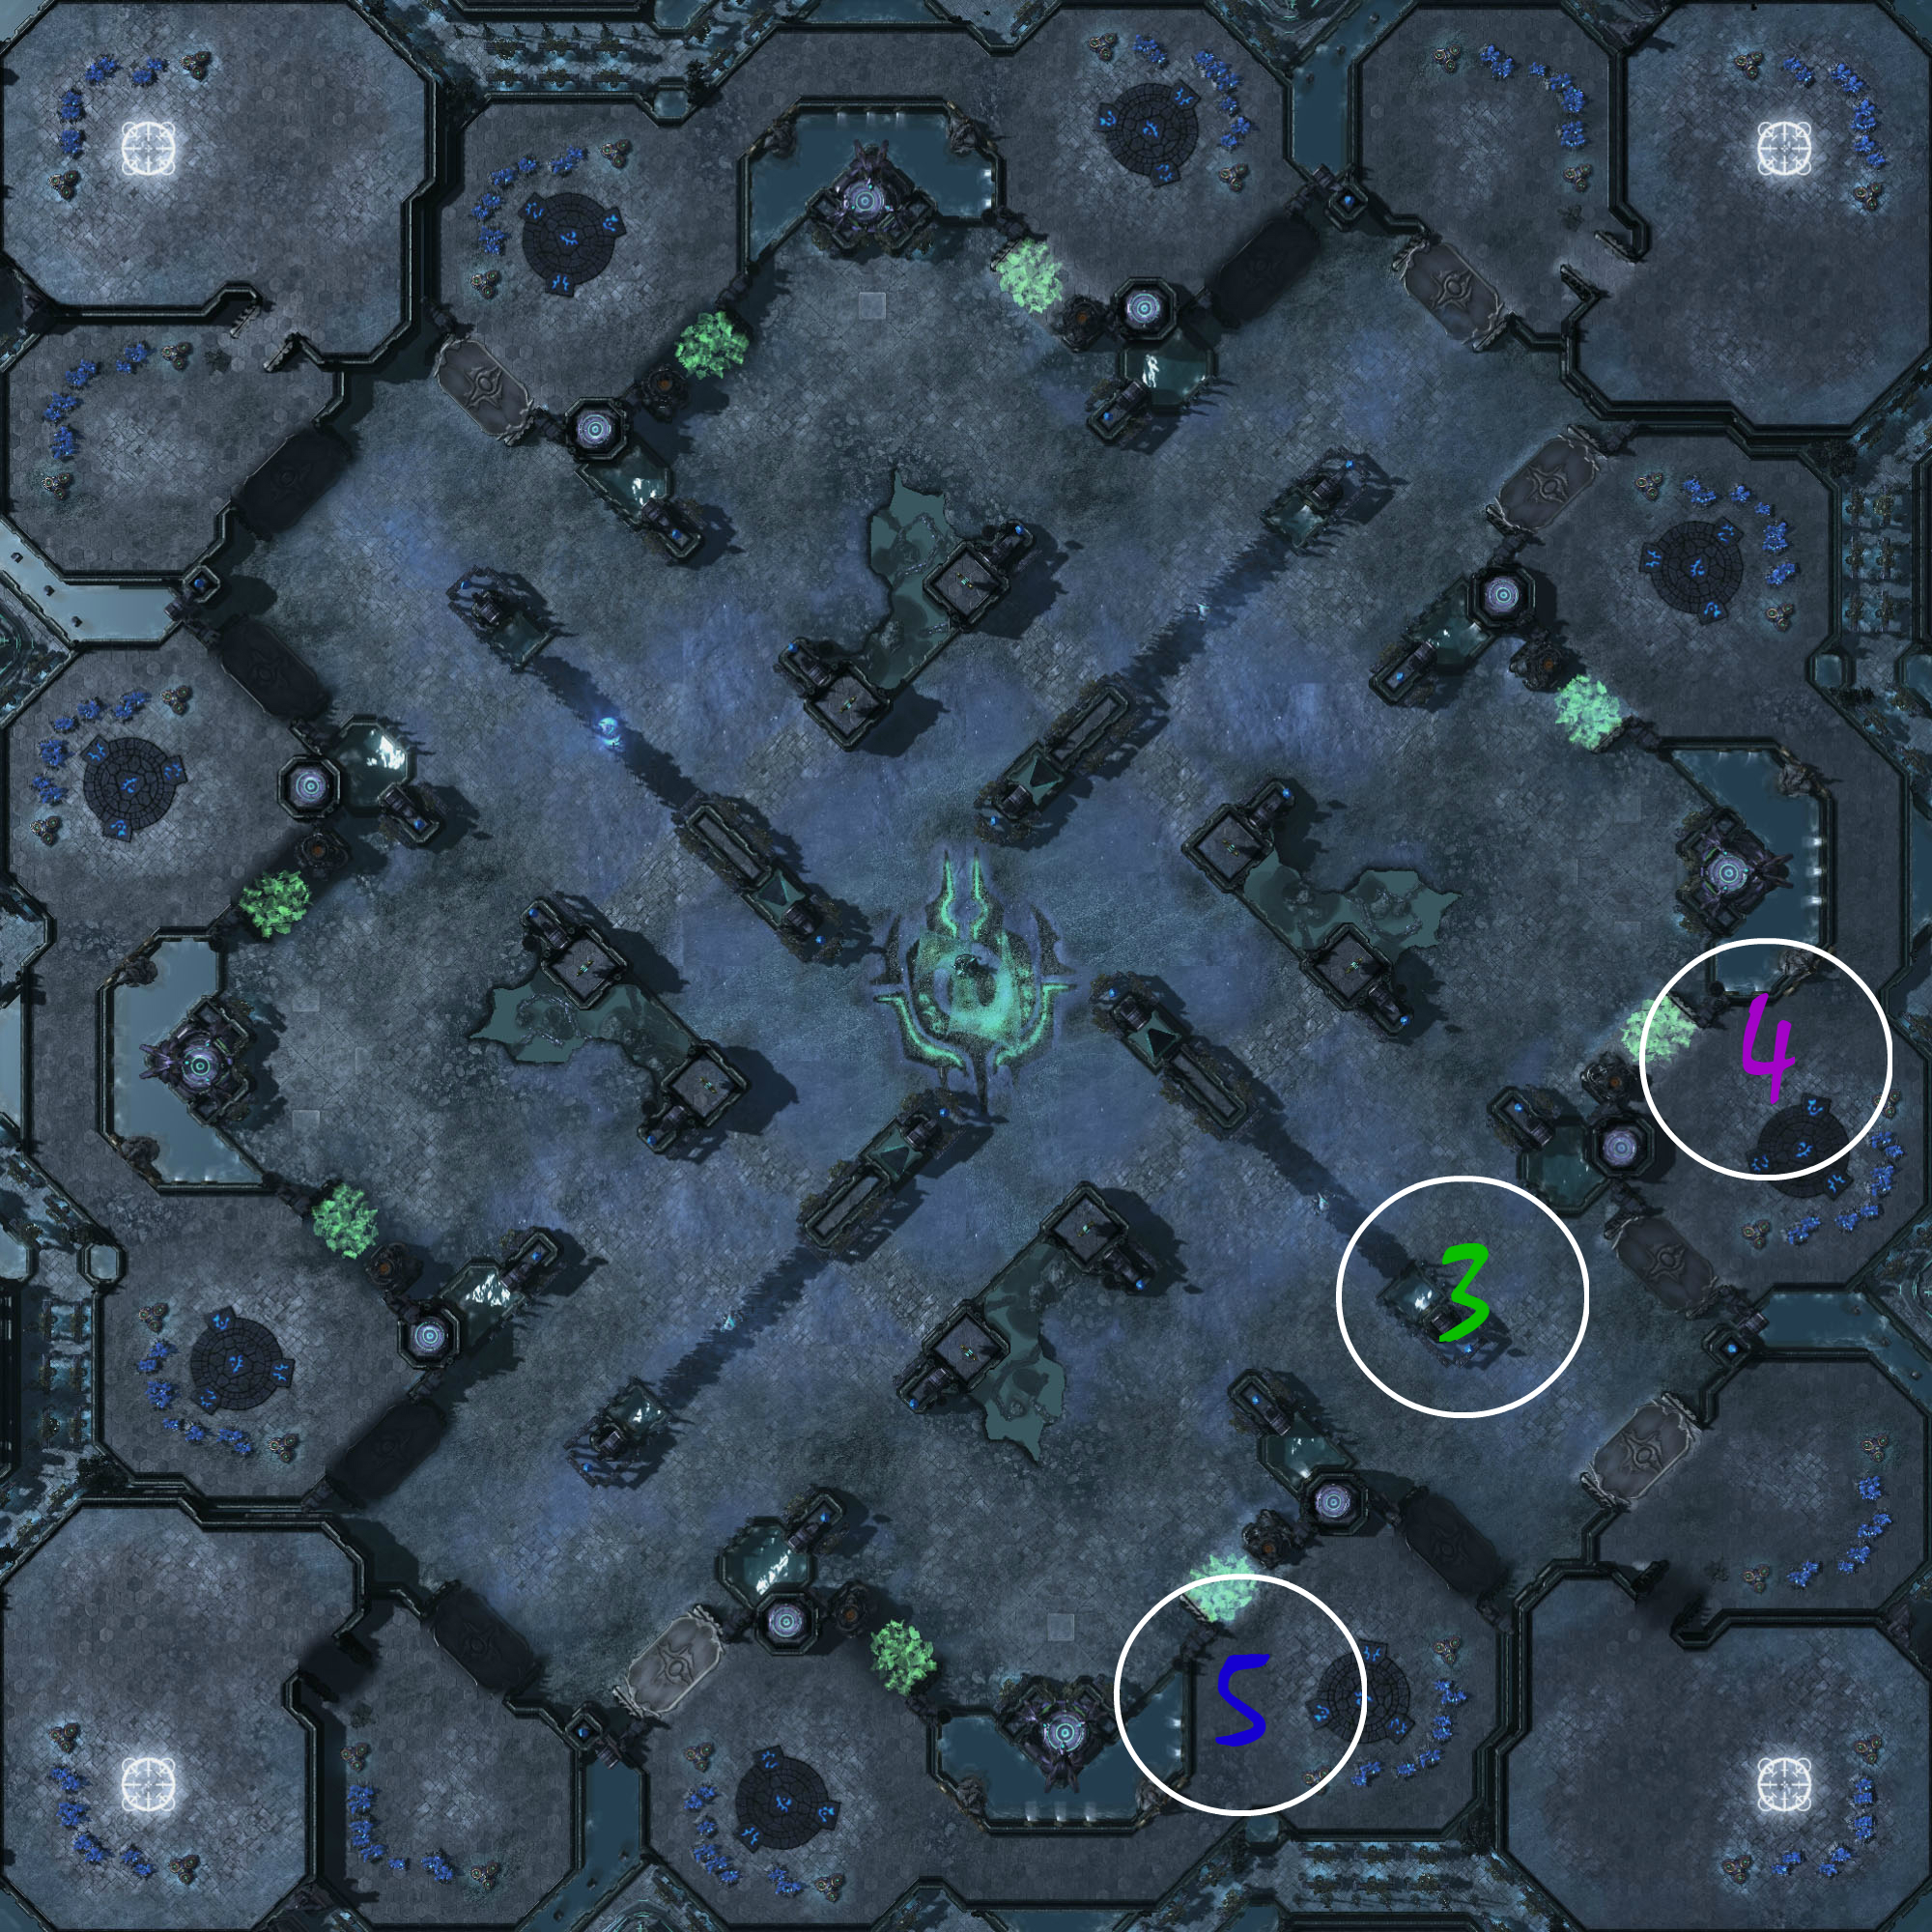
Catalyst
Notes
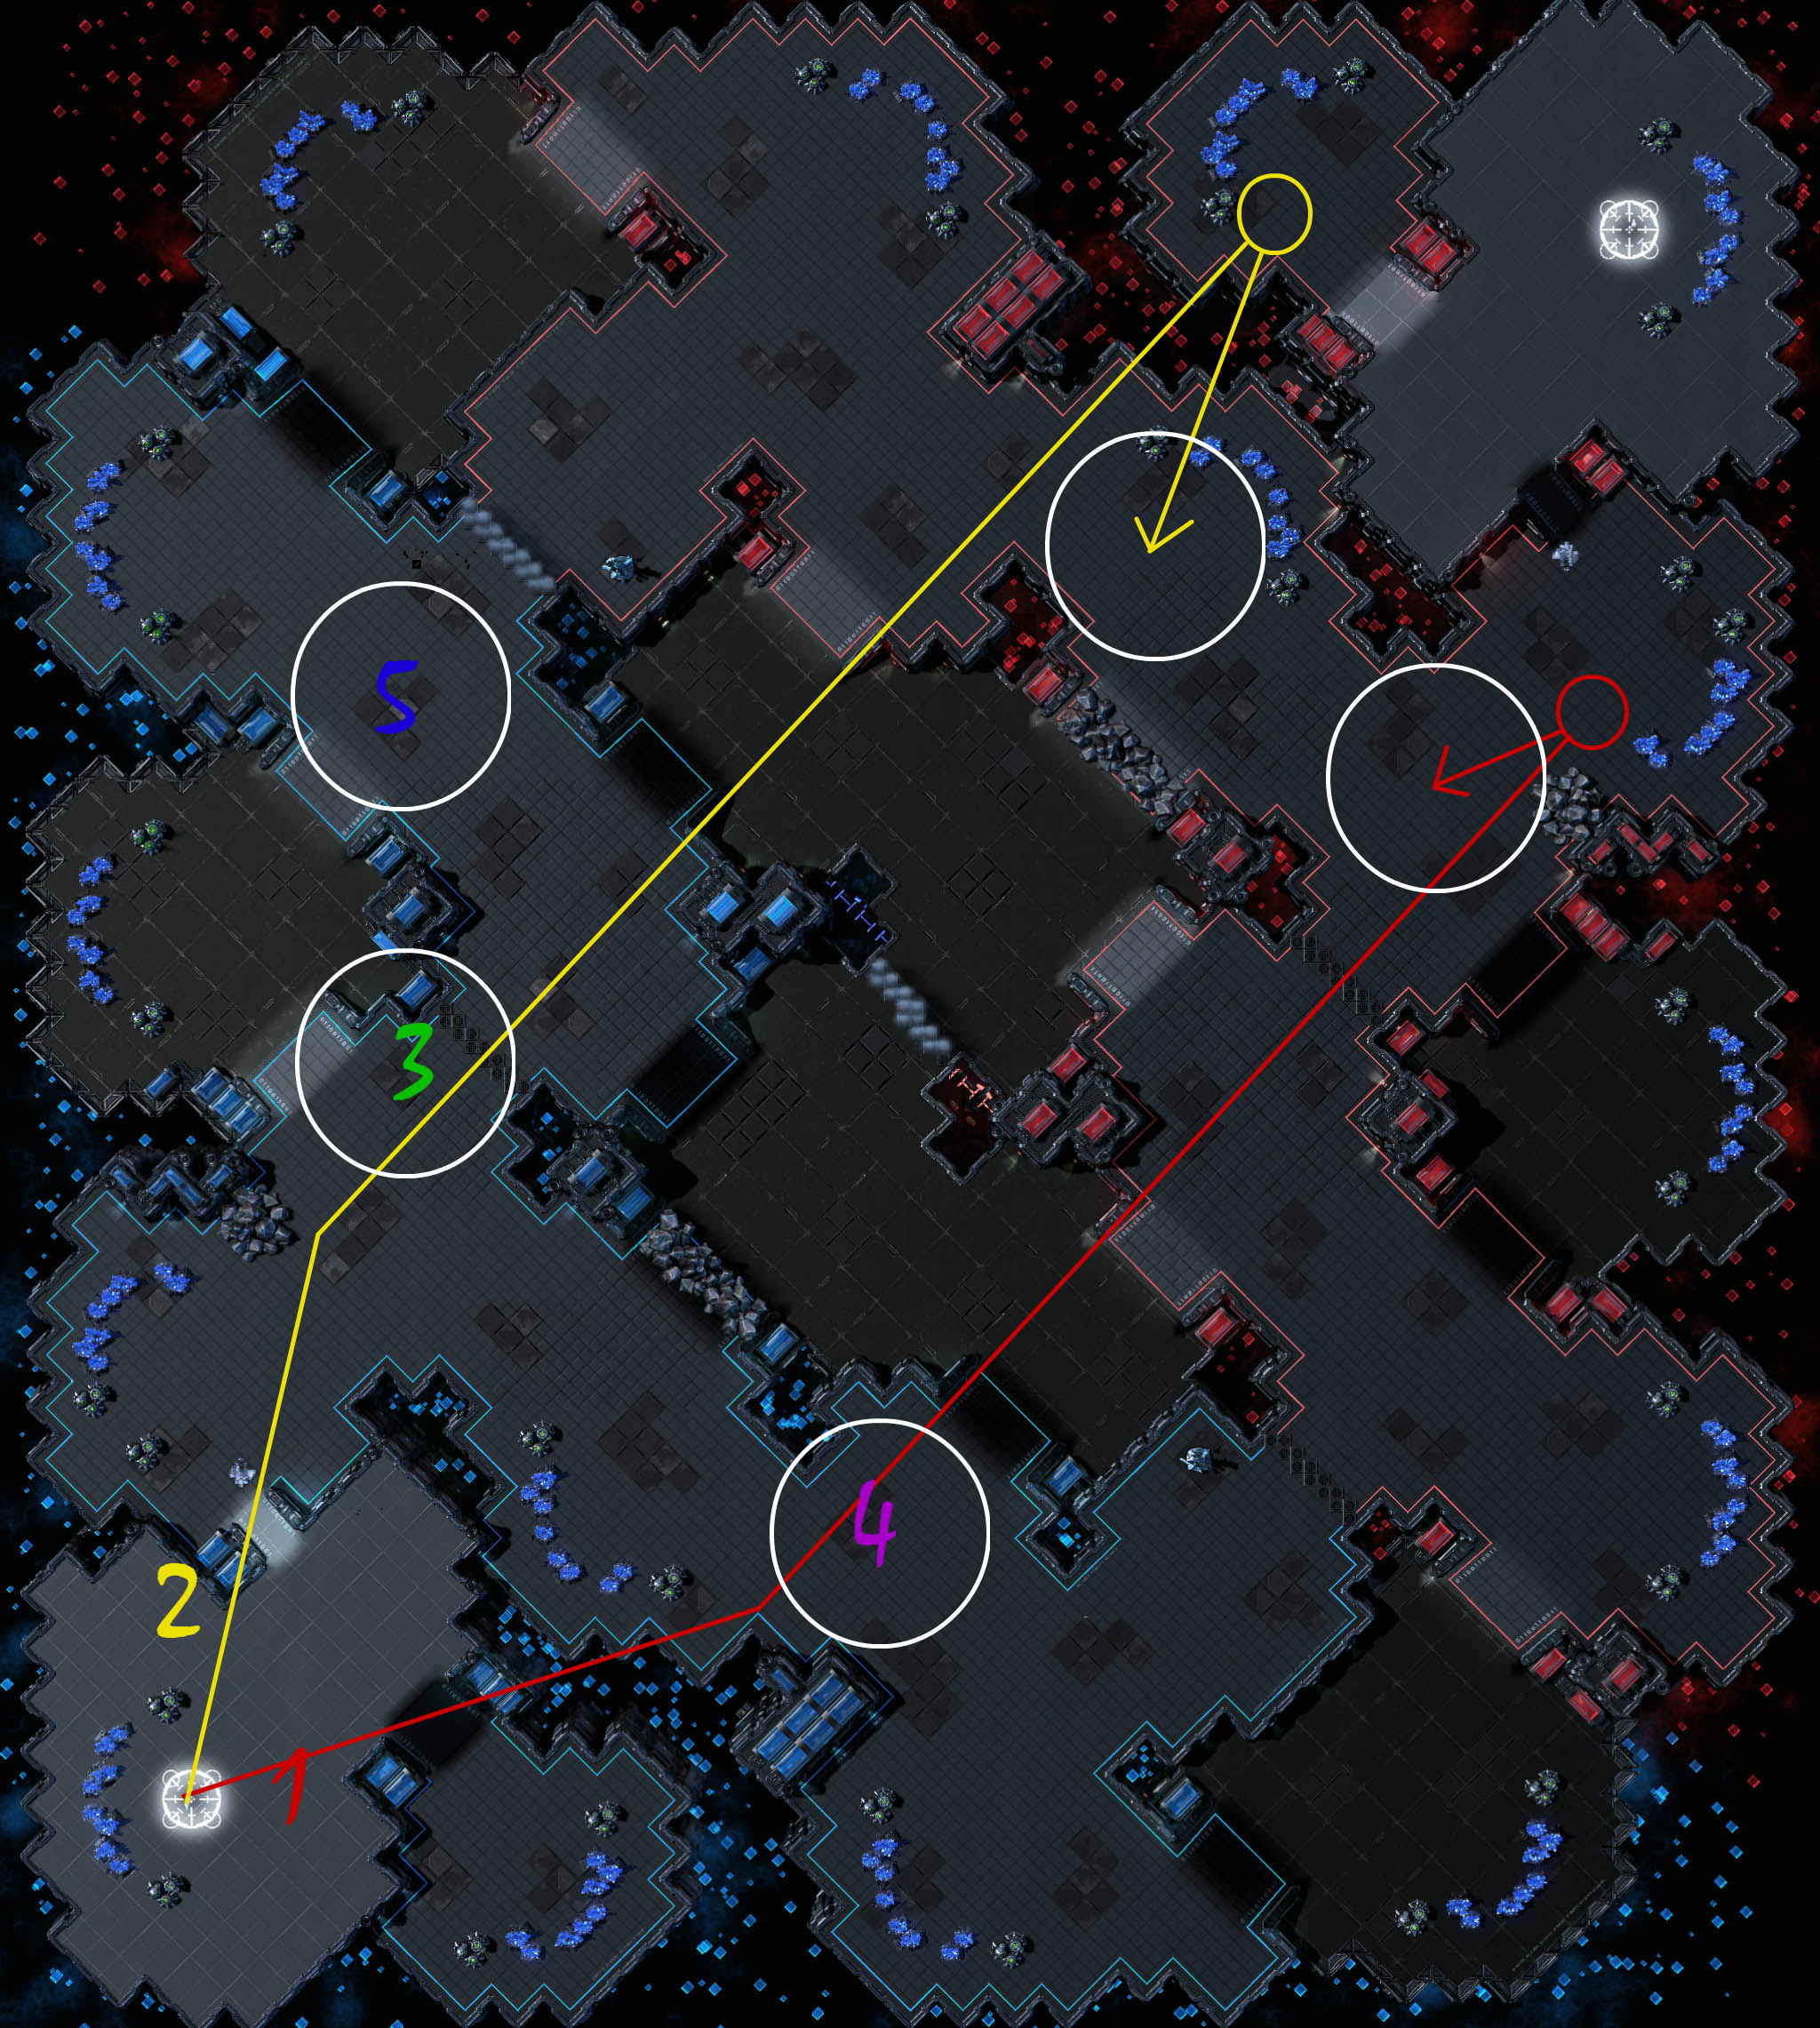
Keep your second overlord on the yellow circle until you see your opponent take their third base. Your fifth overlord can go in either location shown, use a zergling or your sixth overlord to gain vision of the one you don’t choose.
Darkness Sanctuary
Notes
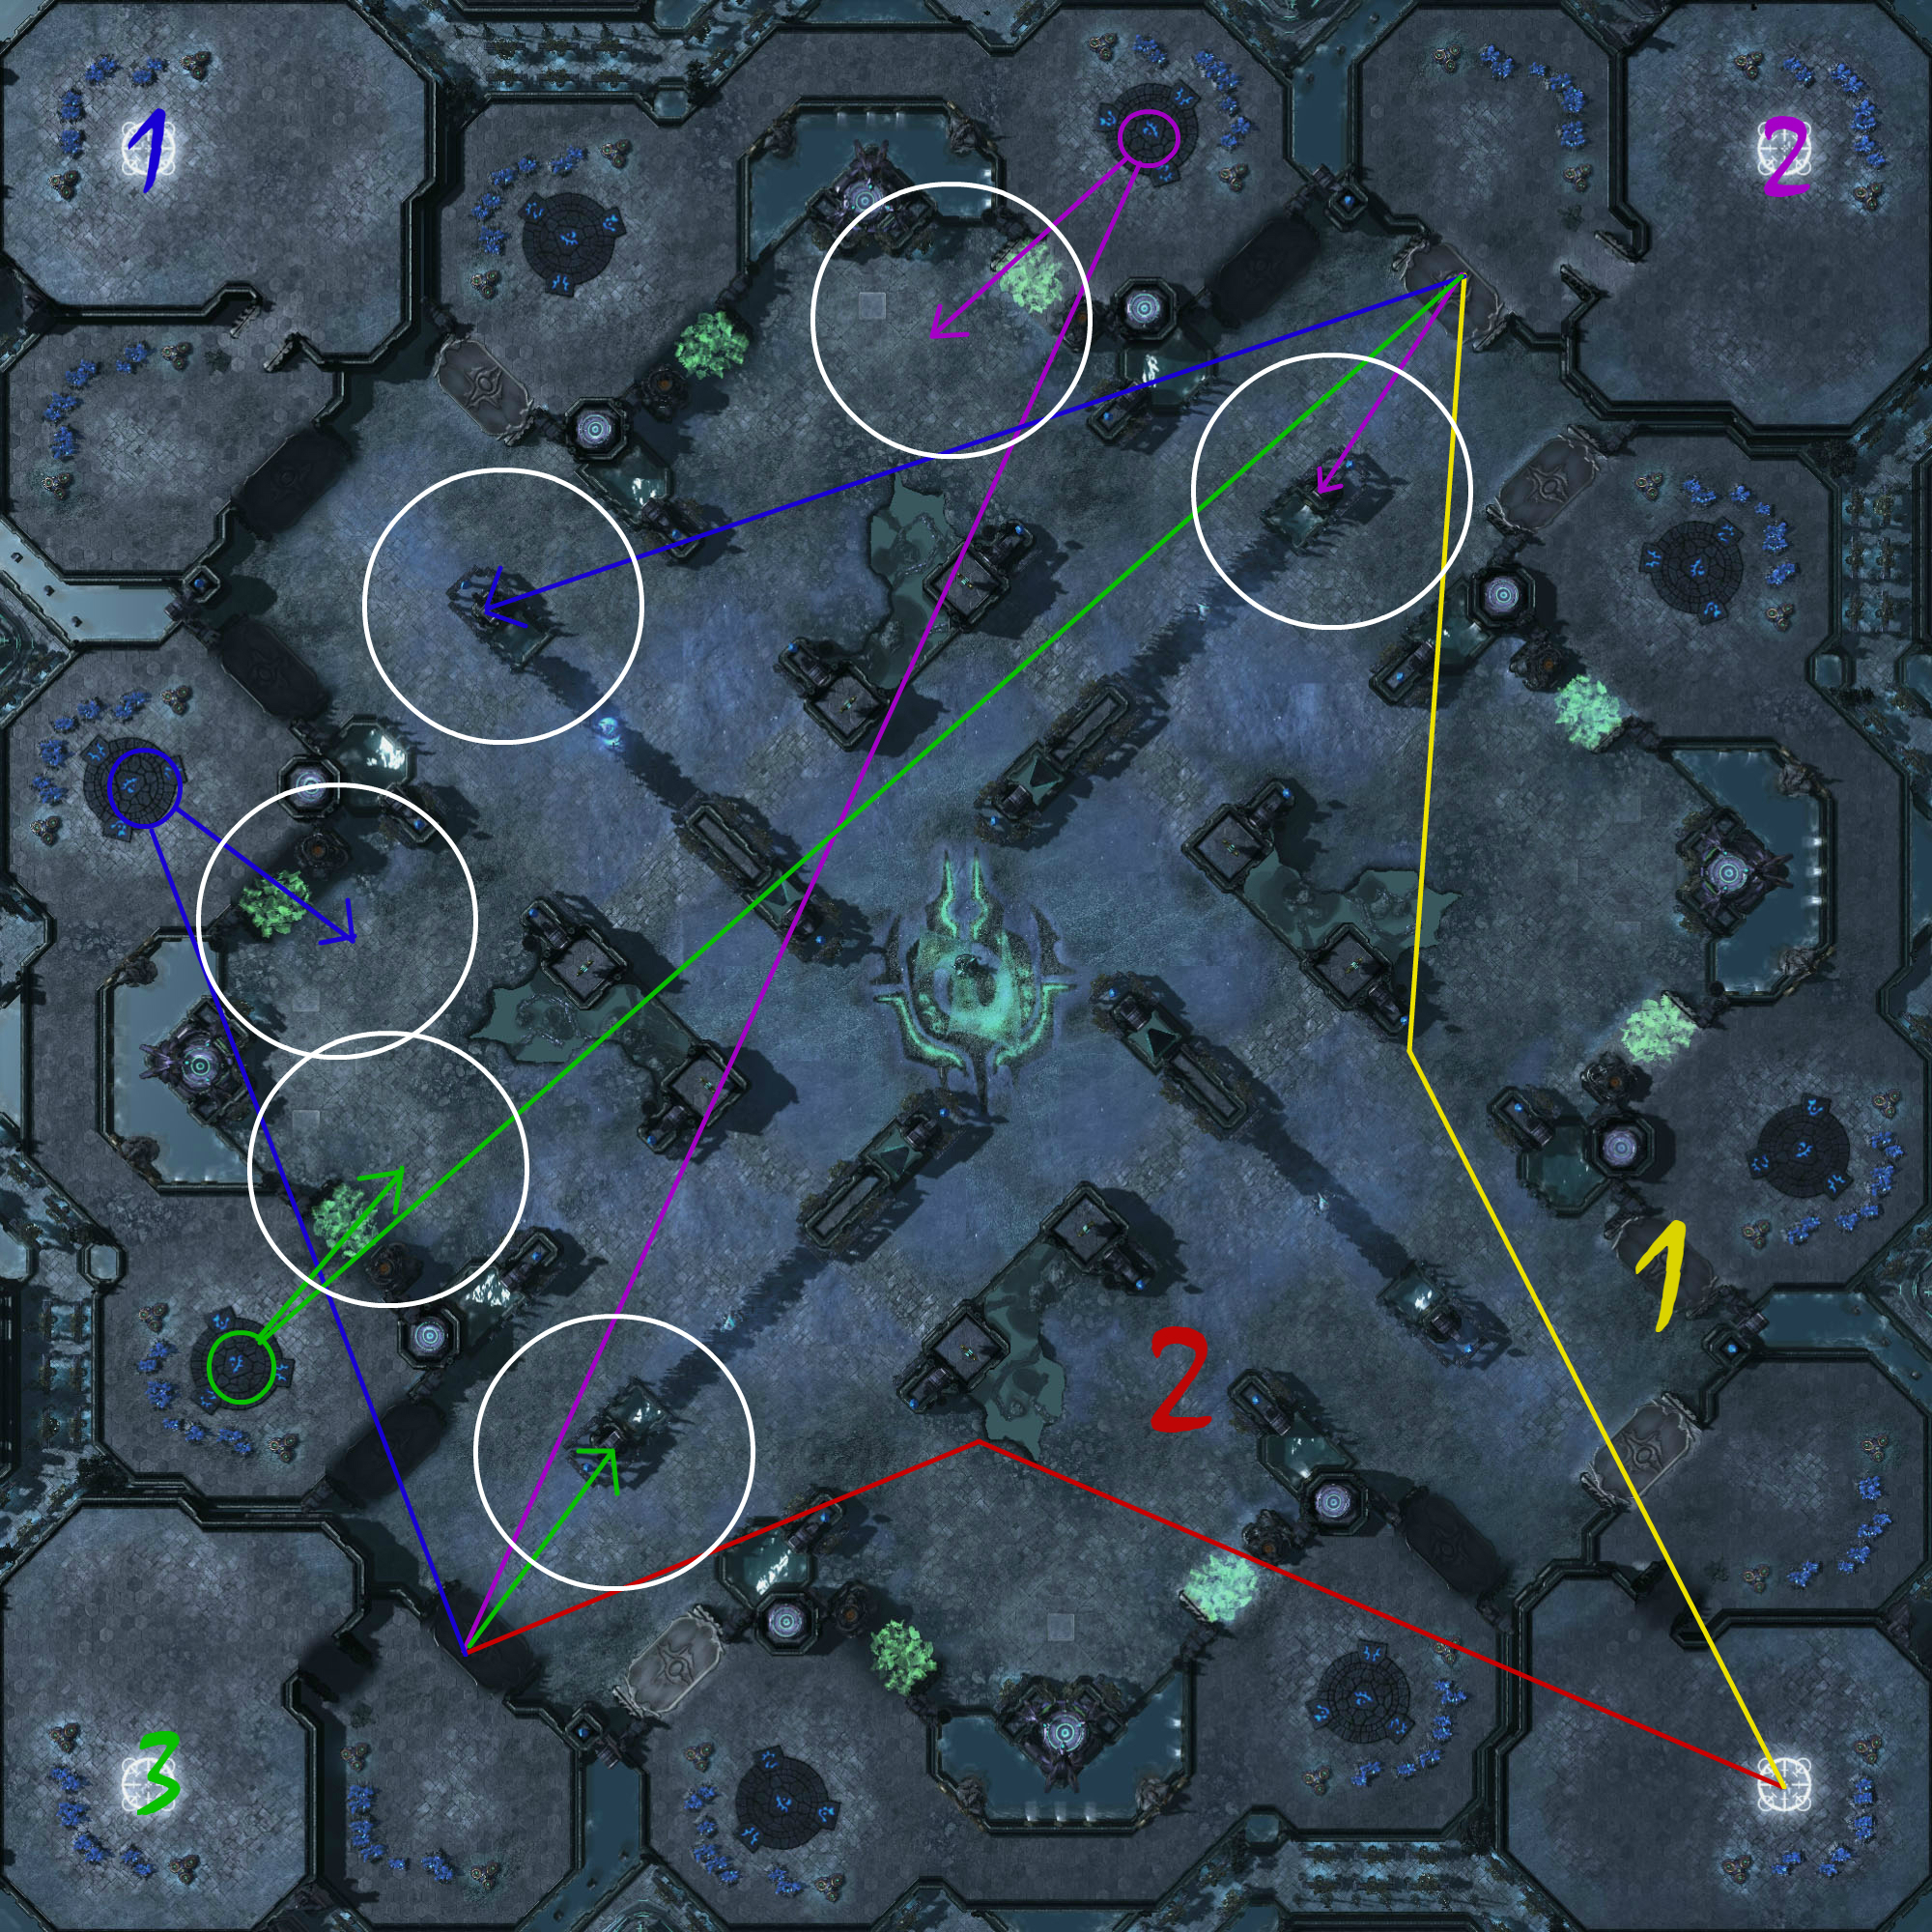
The first image shows the paths for your first two overlords and the second image shows locations for your third, fourth and fifth overlords. Both are if you start in the bottom right hand corner. For the first and second overlords, the red and yellow lines are the initial paths, the purple lines are for if your opponent is in the top right corner, the green lines are for if your opponent is in the bottom left, and the blue lines are for if your opponent is cross spawn.
Dreamcatcher
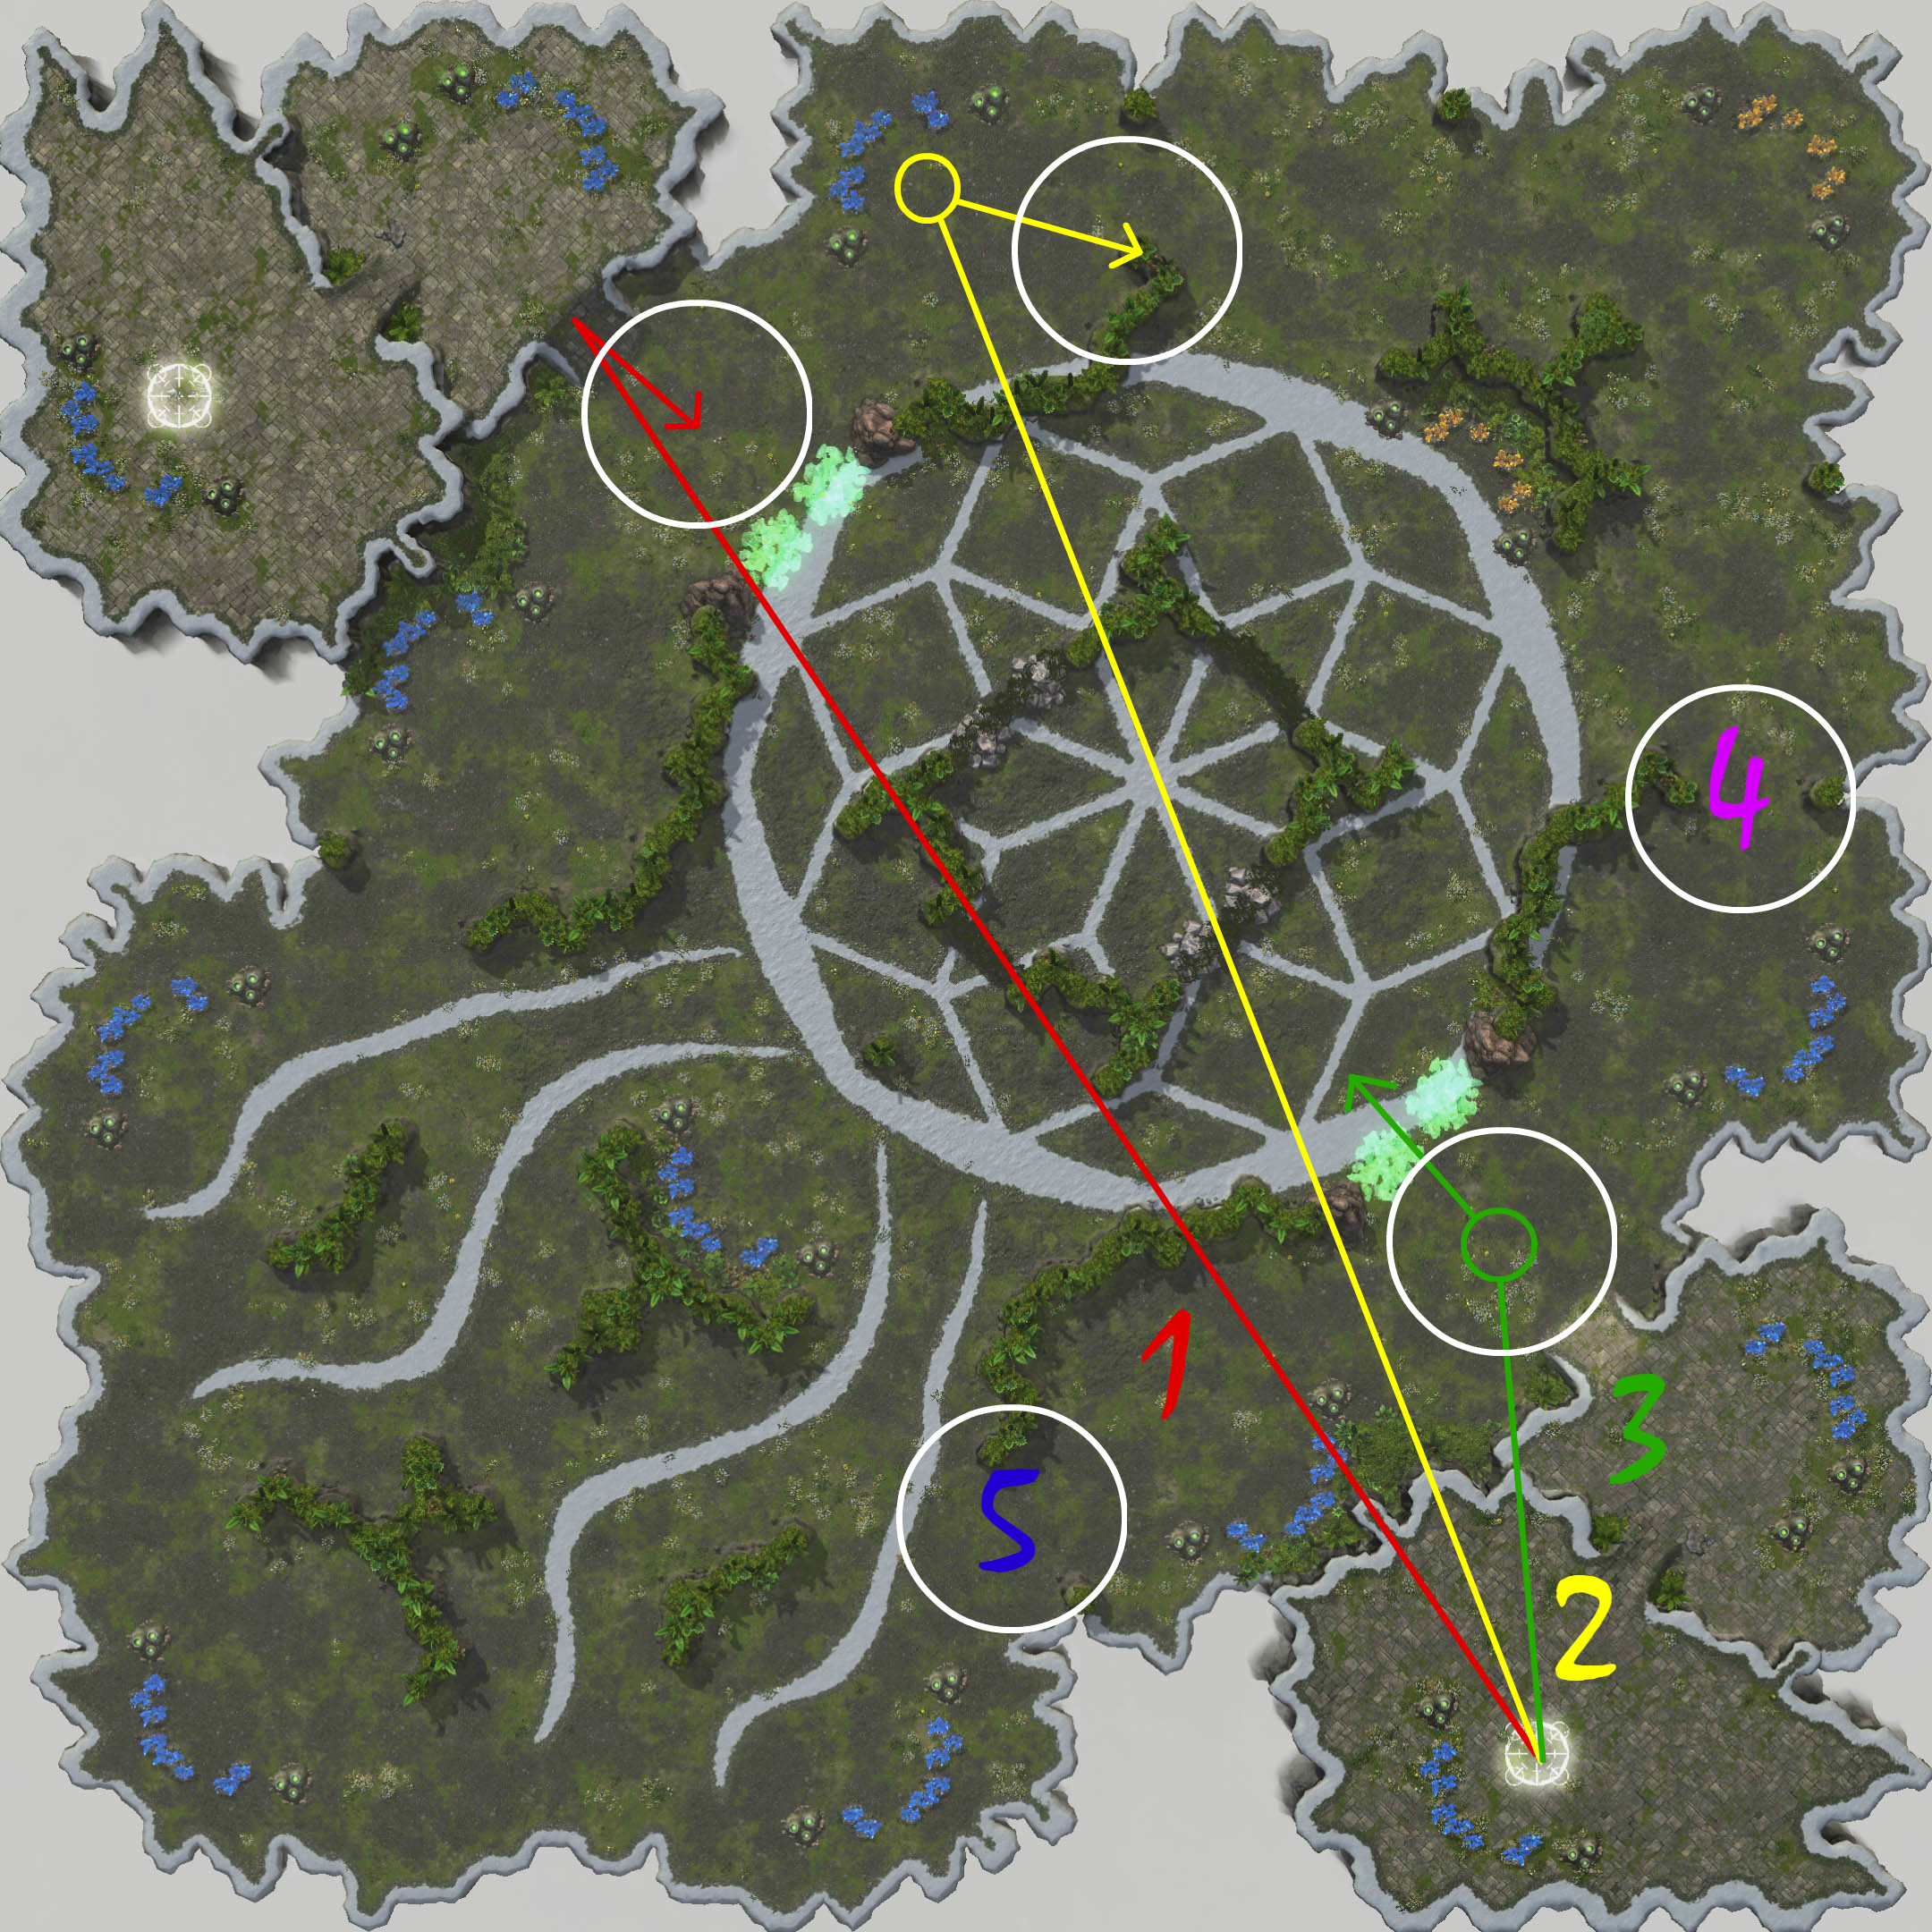
Notes
The second overlord should stay at the third until your opponent takes it. The third overlord should stay at the green circle until your 4th and 5th overlords are in position. Once those overlords are in position, you can move it forward to see the path past the destructible rocks.
Lost and Found
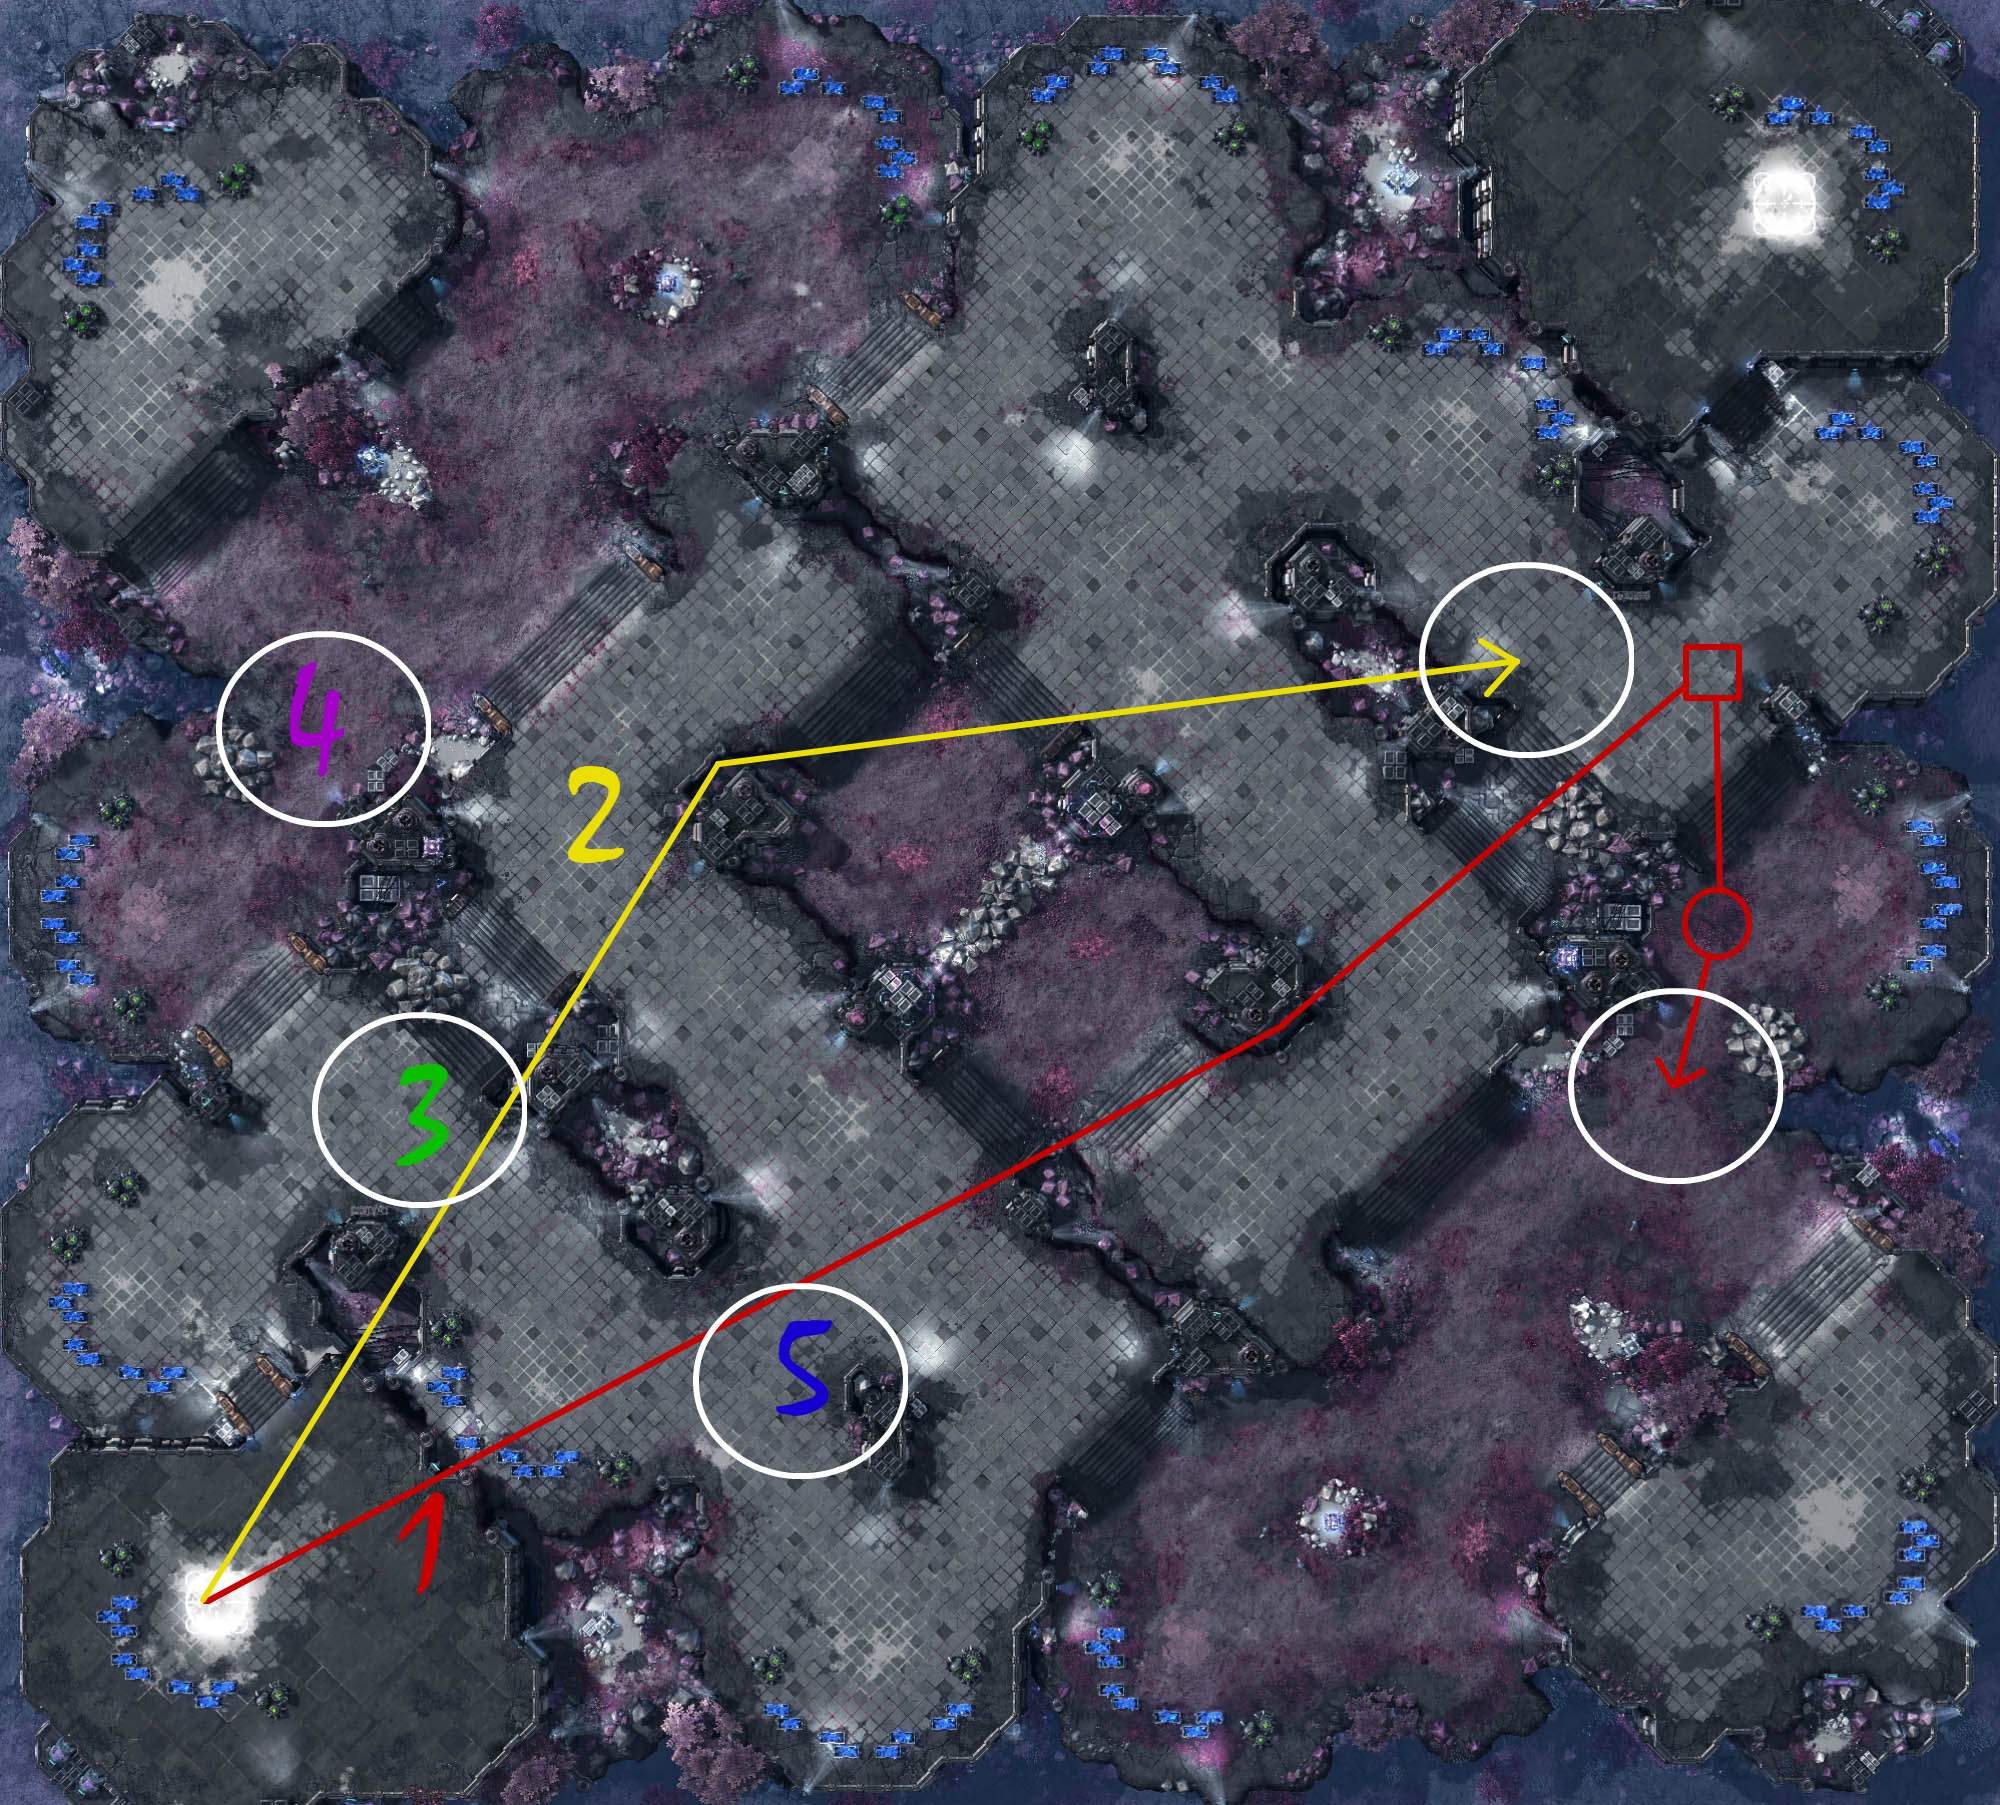
Notes
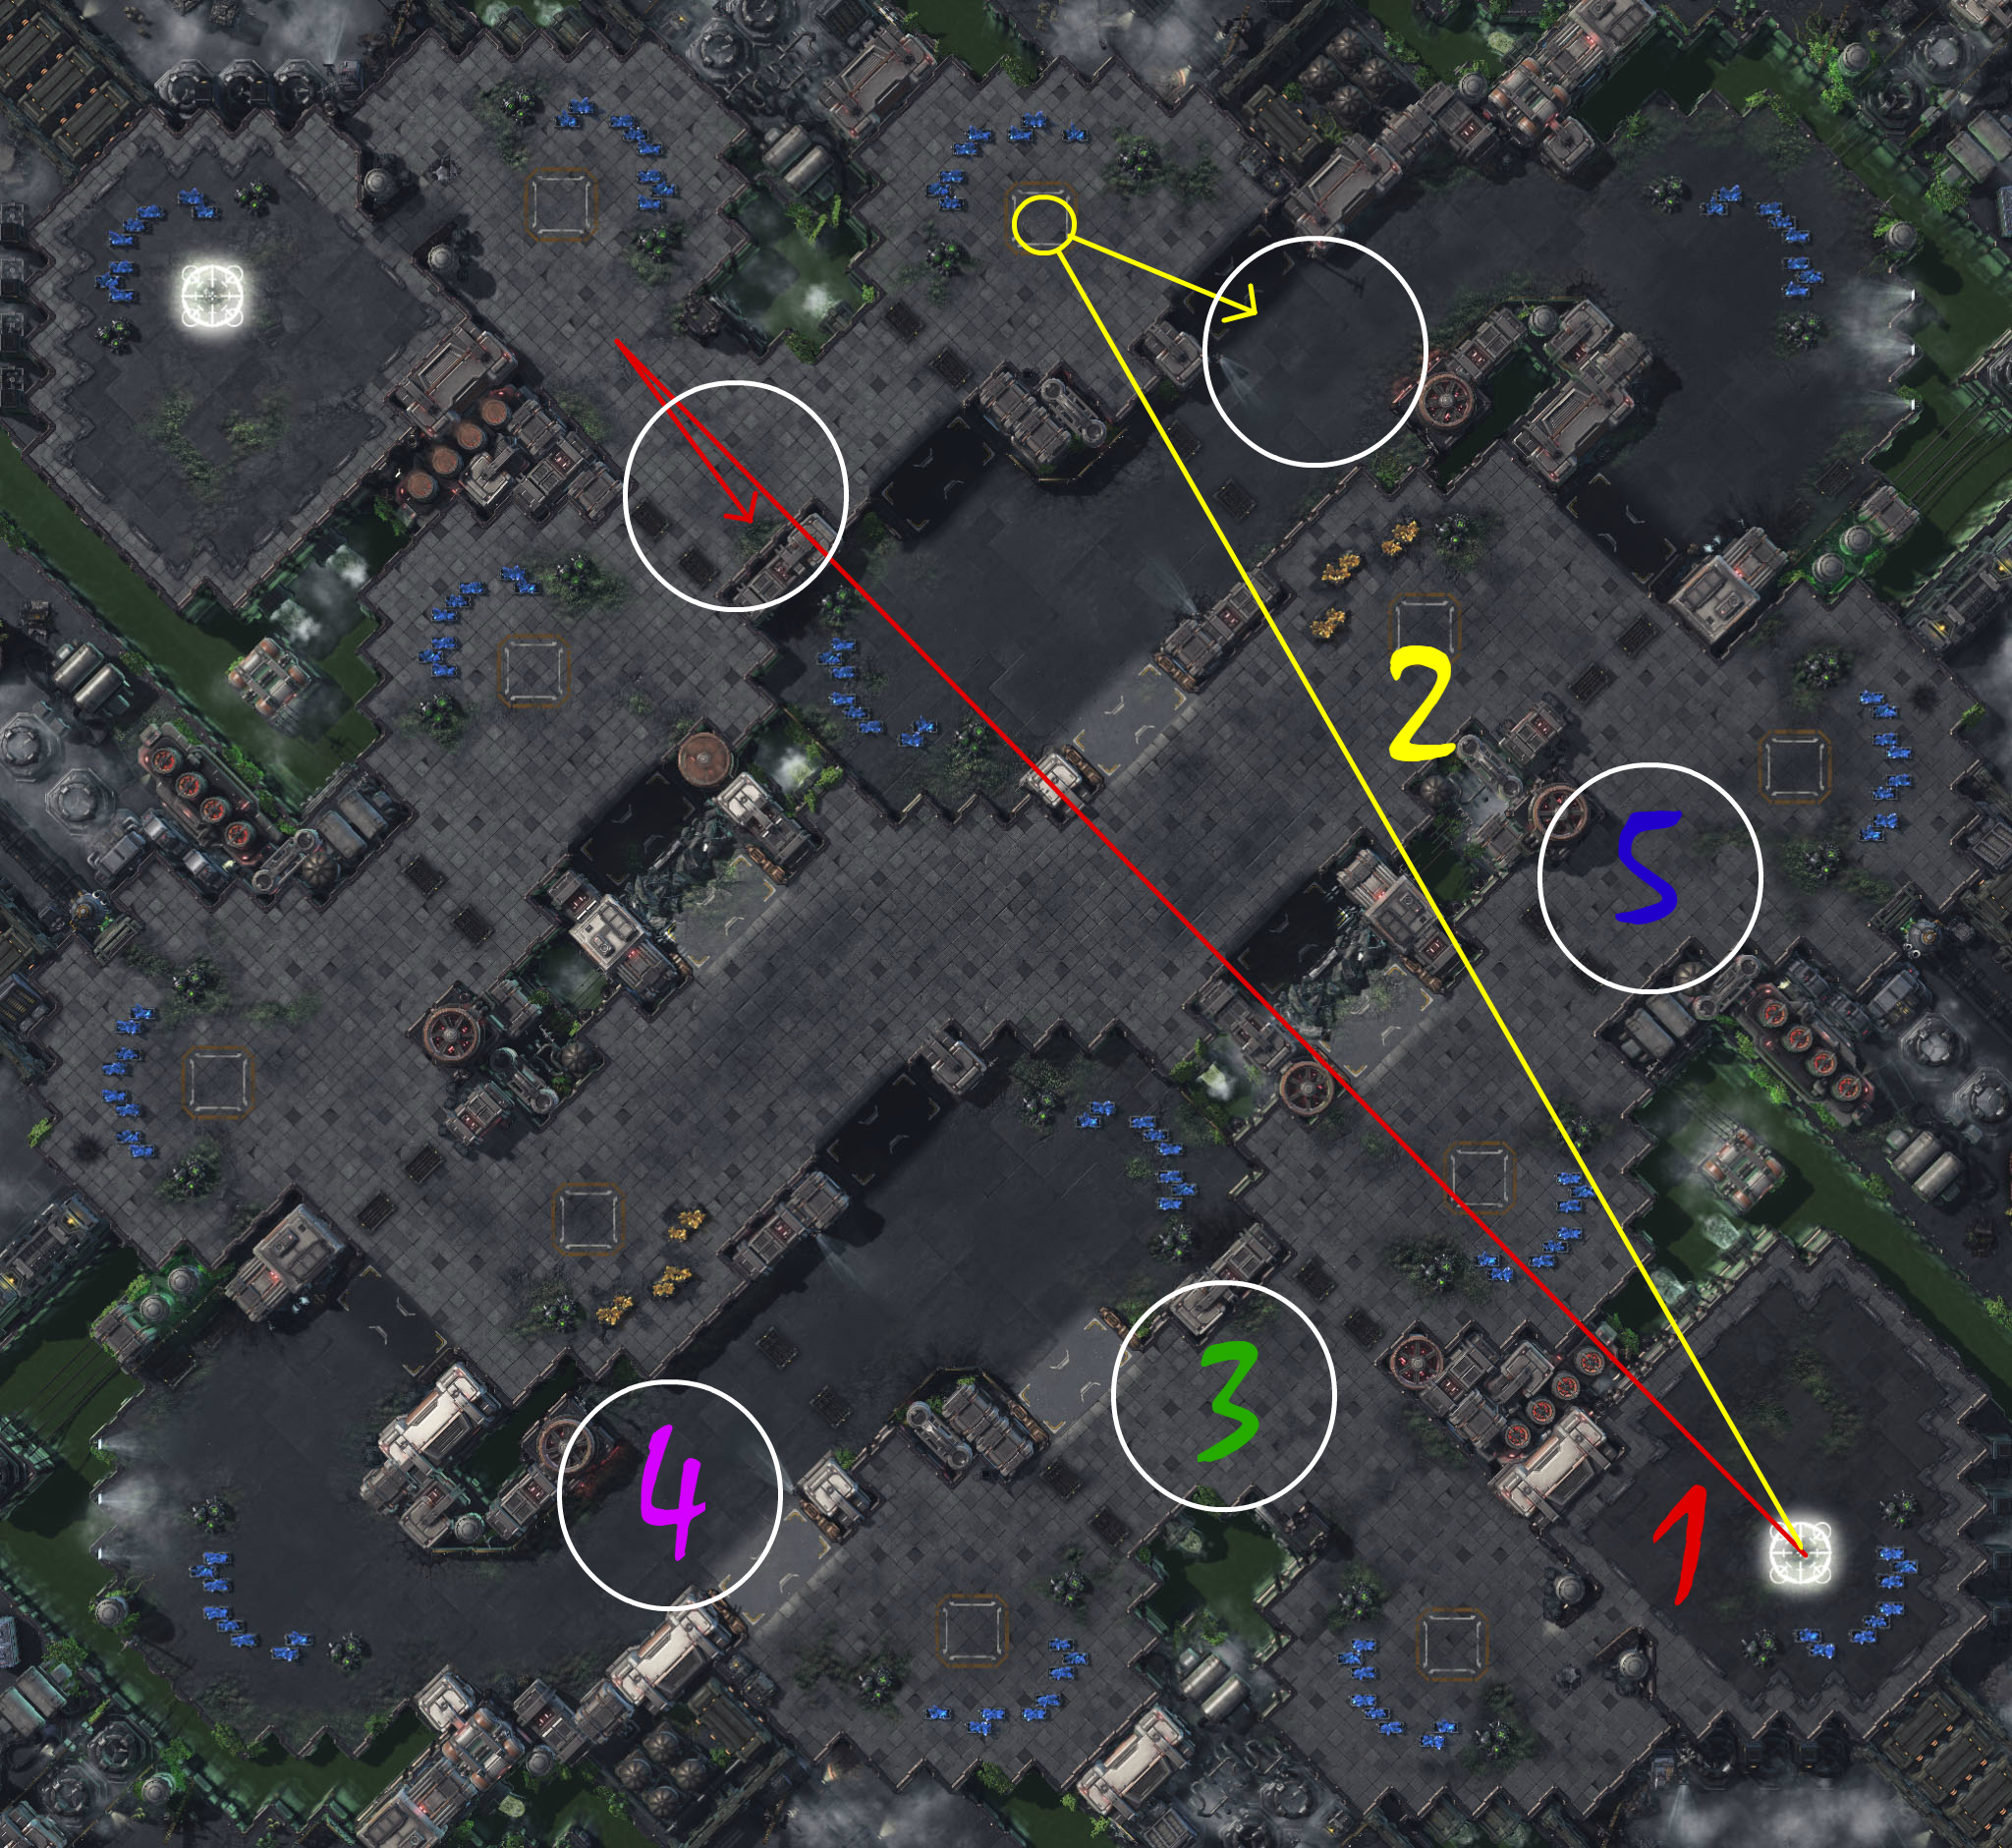
Keep your first overlord at the red square until the second overlord is in position, then move it to the red circle. Move it past the circle once you have seen your opponent take their third base.
Redshift
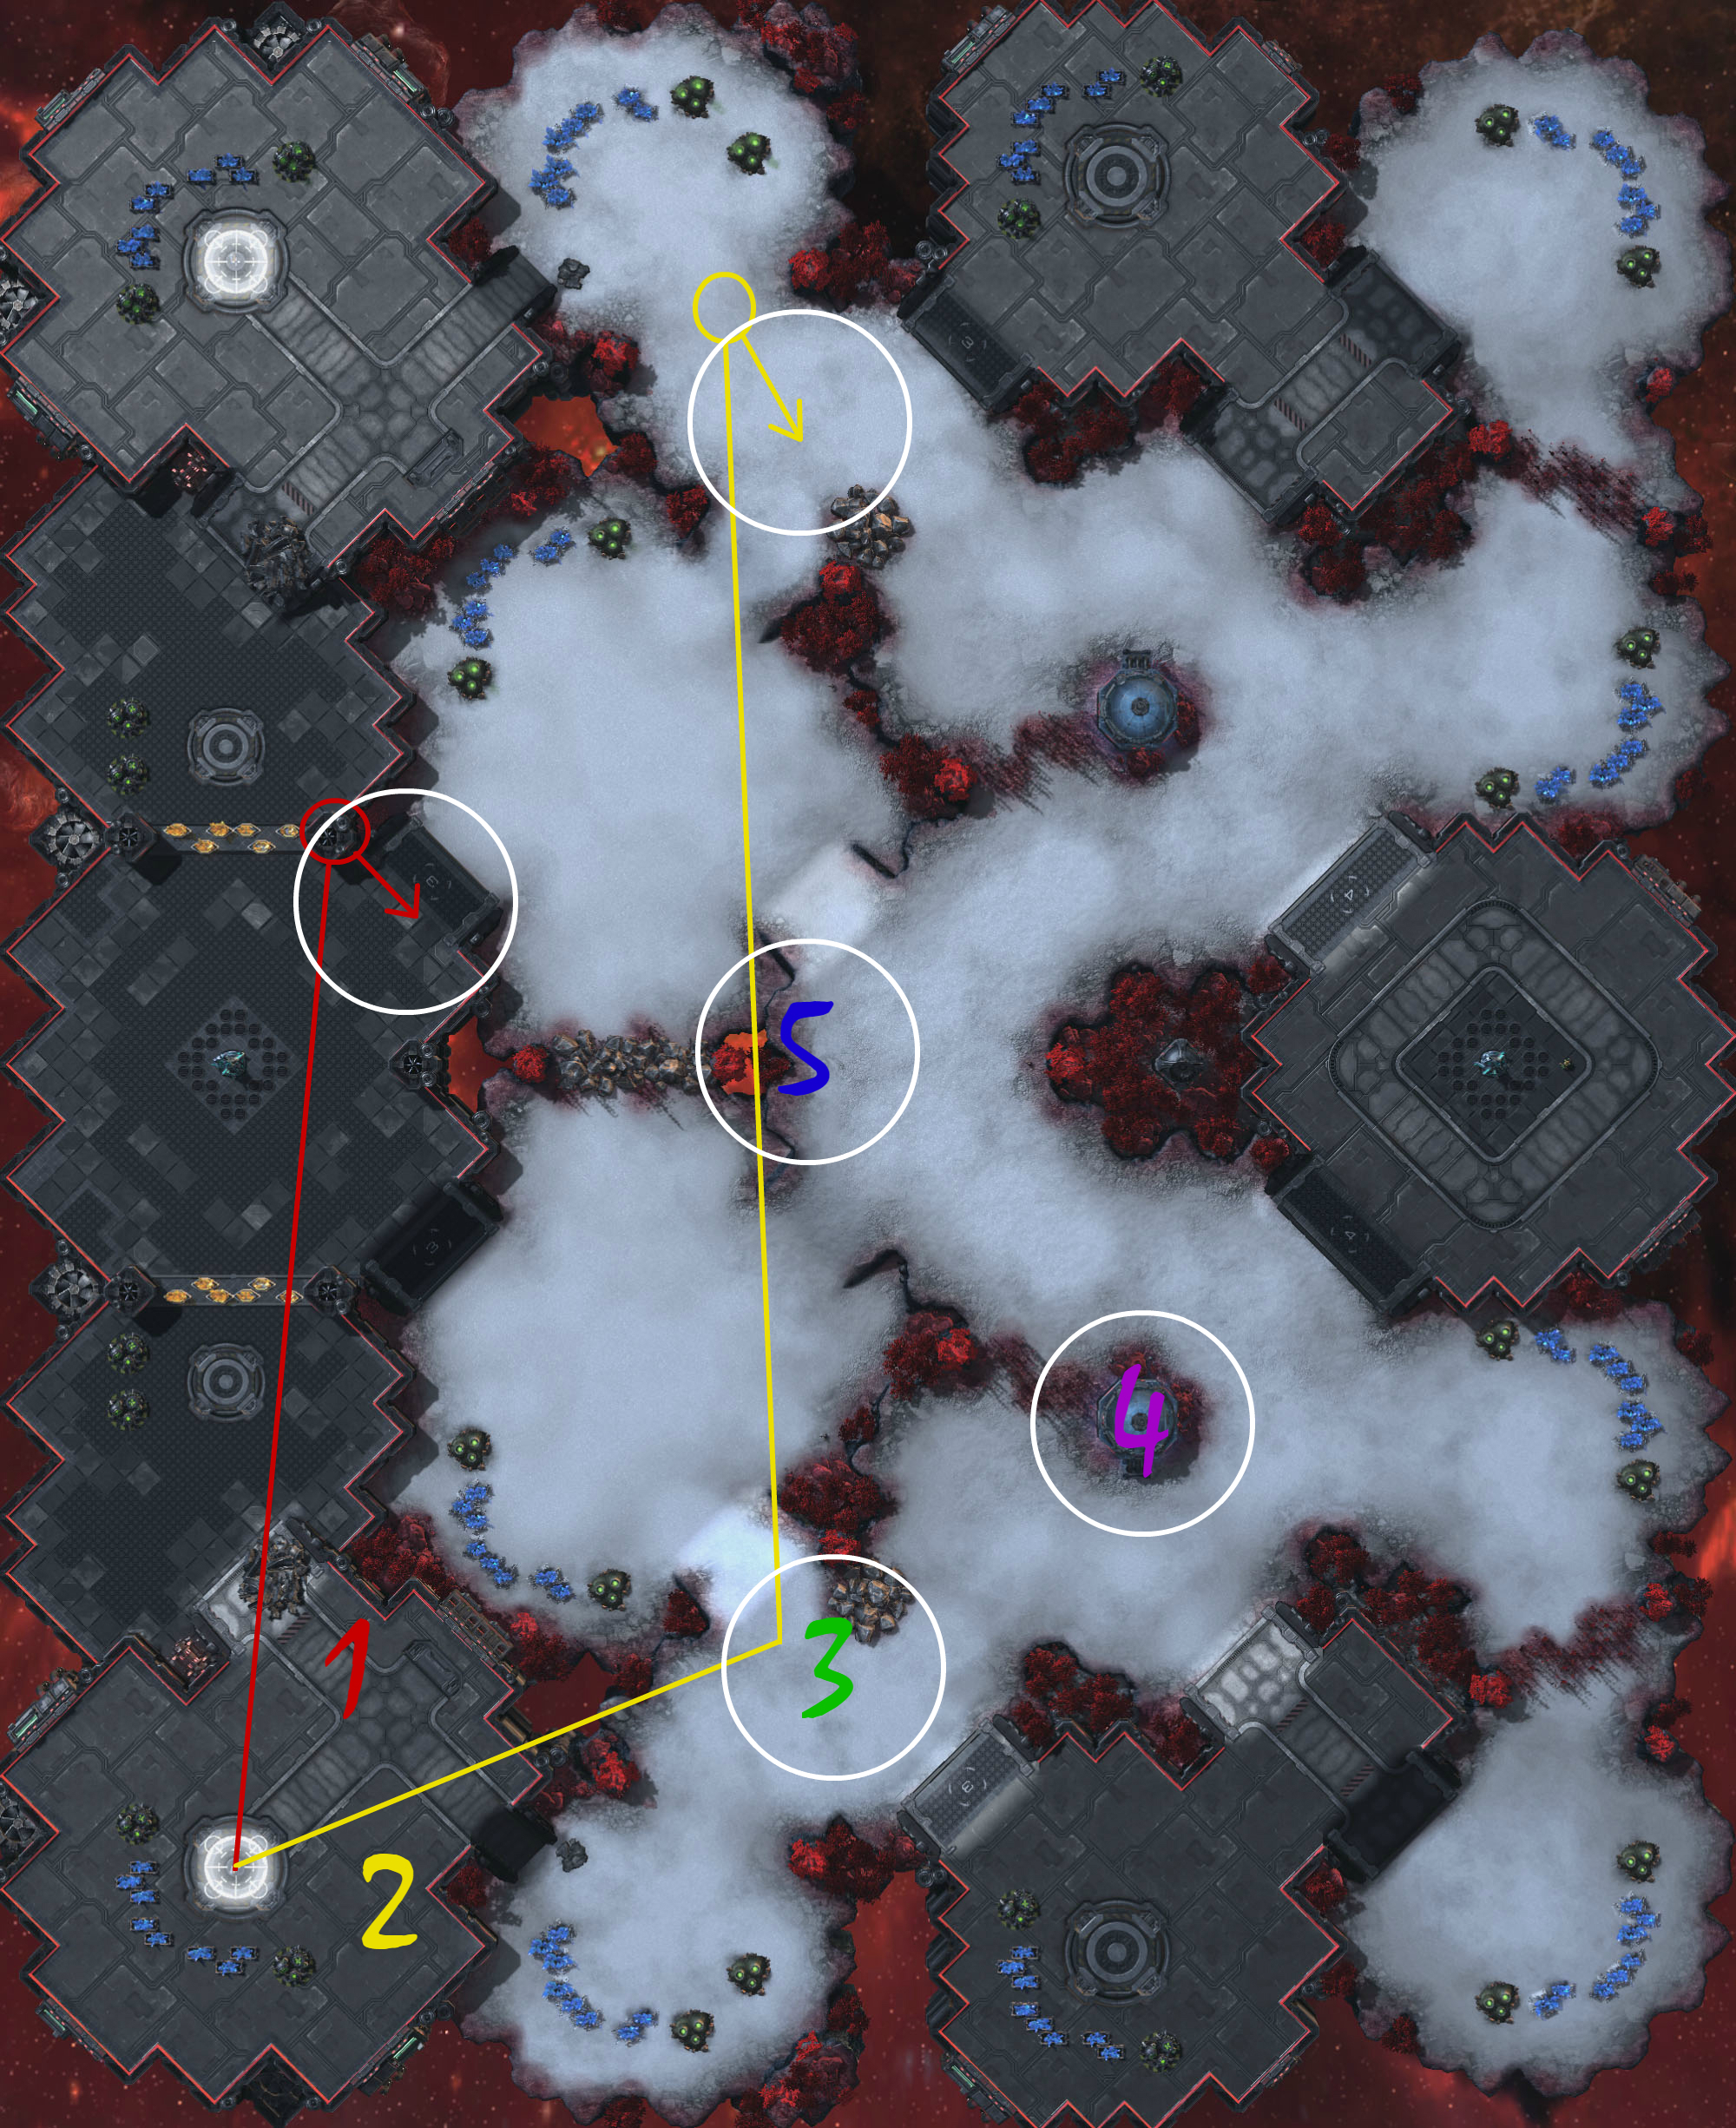
Notes
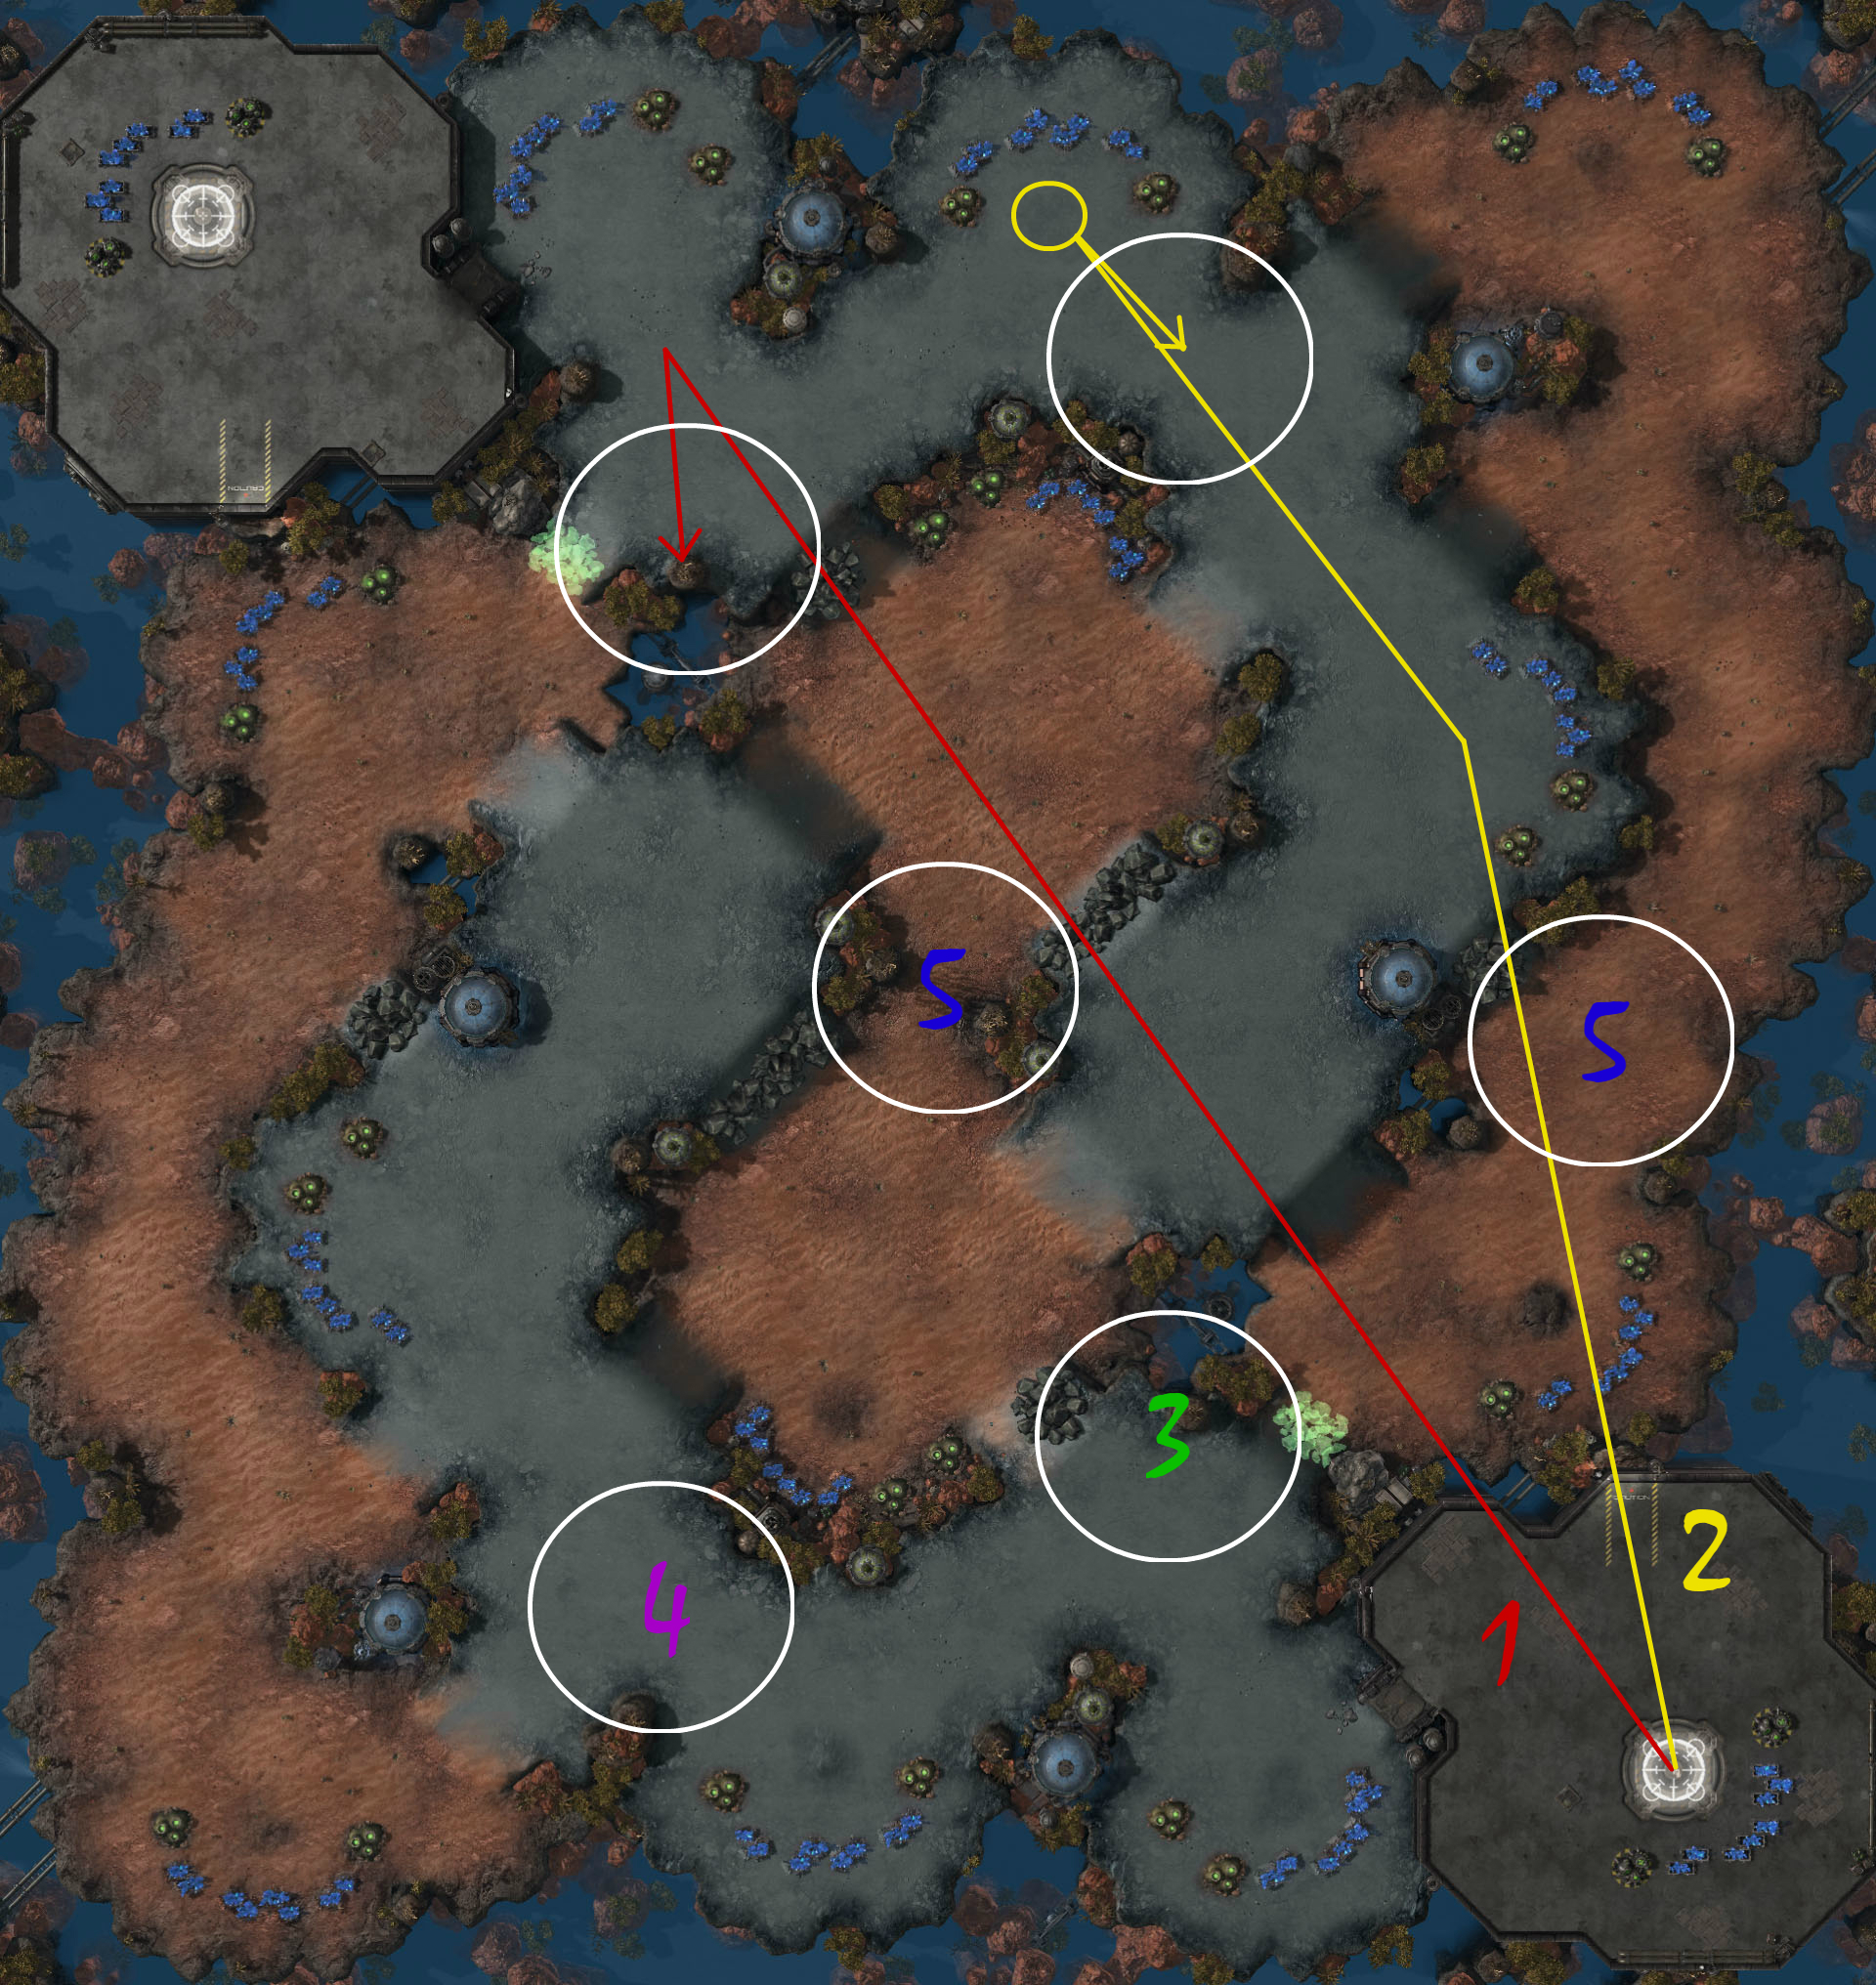
Keep your first overlord on the red circle until your opponent has taken the gold base / once their queen pushes your overlord away. The second overlord can stay on the yellow circle until you have seen them take the blue base. The fifth overlord should be just close enough to see if the rocks are being destroyed.

